
Because of Android's massive array of supported smartphones that carry vastly different display sizes and resolutions, the operating system uses a value known as DPI to determine the size of icons and visual assets that will best suit a given screen.
Pixel Density (or Dots Per Inch) represents the amount of individual pixels in an inch-long line of a given display, and this is the number that Android uses when determining the ideal size for images and icons displayed by one of its apps.
For years, rooted users have toyed with their device's DPI values to sort-of "trick" Android into displaying icons and visual assets at a different scale. Think of this as telling your operating system that your device has a larger or smaller display than it actually does, with the end result being that icons and other visual elements are either larger or smaller than they originally were.
In the past, changing these DPI values required complicated editing of your device's Build.prop file, but developer Bassel Bakr has created an app that simplifies this process and even allows for further fine-tuning of the display scaling. So if you've ever wanted to fit more (or less) content on your device's display, the process has never been easier.
Requirements
Step 1: Install a Custom Launcher
The stock home screen app on the Galaxy S5 was designed specifically for the stock DPI values of the phone. This is the case for most manufacturer-designed launchers, and since they don't include any visual assets for non-stock DPI values, you'll have to use a third-party launcher if you want to adjust your pixel density.
Custom launchers are designed to work on multiple devices with varying pixel densities, so they will scale properly when you alter your DPI. There are many free custom launchers available on the Play Store, but among them, the most popular are Nova Launcher, Apex Launcher, and the Google Now Launcher.
No matter which launcher you choose, just press the Home button after installation is complete and you will be asked to set a new default home screen app. From the Complete Action Using dialog that pops up, select the launcher that you just installed and choose Always.
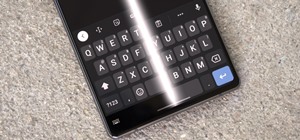
These same restrictions hold true for the stock Galaxy S5 keyboard, so you may want to consider installing a third-party keyboard as well.
Step 2: Install Window Manipulator
Bakr's easy-to-use DPI-modding app goes by the name of Window Manipulator, but it hasn't found its way onto the Play Store just yet, so you'll need to download it separately.
Just point your device's web browser to this link to download the installer file, then tap the Download Complete notification to begin the installation process.
Press Install on the next screen, then when that's finished, tap Open.
At this point, Window Manipulator will ask for Superuser privileges. Tap Grant on the popup that appears, then you'll be taken to the app's main screen.
Step 3: Customize Your Screen Density Values
Window Manipulator provides three main options to customize the screen density on your phone: Density, Screen Size, and Overscan Area. Each option has a Reset button beneath it, so if you get too far away from that stock look, you can always go back.
Rather than having a specific DPI value for each different device, Android groups displays with similar DPI values together. As such, there are currently 7 different DPIs that Android supports natively:
- 120 (LDPI)
- 160 (MDPI)
- 213 (TVDPI)
- 240 (HDPI)
- 360 (XHDPI)
- 480 (XXHDPI)
- 640(XXXHDPI)
While DPI values that fall in between these numbers will still function properly for the most part, only these values will ensure that no minor cropping, stretching, or overlapping of icons will occur.
With that in mind, tap the Set Density option and enter your desired DPI value. As a general rule, the smaller DPI value you enter here, the smaller your icons and visual assets will appear. So with a stock DPI value of 480 on the Galaxy S5, enter a lower number for smaller icons or a higher number for larger icons.
The changes you make occur on the fly, so you'll have a good idea of what the end result will look like as soon as you press OK. Apps that have already loaded their icons may not reflect your changes without a reboot, though.
From here, you can tap the Set Screen Size button to enter a different display resolution. Think of this like stretching or shrinking your display area, so use this option in to customize your DPI tweak even further. The format to use in this field is WIDTHxHEIGHT, and the stock Screen Size value for the Galaxy S5 is 1080x1920.
Lastly, the Set Overscan Area option allows you to add blank area to the borders of your display. This is useful if you're using a Screen Size value that does not match the original aspect ratio of your display and you would like to crop an edge to remedy any issues with images being rendered off screen. The format to use here is Left,Top,Right,Bottom, and the stock values are 0,0,0,0.
If, at any time, you feel that you've gotten too far off track with these entries, just tap the Reset button beneath any option to revert to the stock values.
Step 4: Reboot to Fully Apply Your Changes
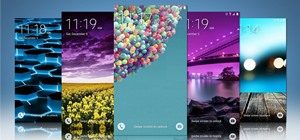
When you feel like you've found that magic combination of values, reboot your phone to clear any cached images. When you get back up, your phone's interface will have received quite the makeover.
The changes apply to all apps installed on your device, so the new look is consistent throughout Android, including your status bar and settings.
What DPI value did you choose? Did you customize the look even further with a Screen Size or Overscan mod? Let us know in the comments section below.
Just updated your iPhone? You'll find new emoji, enhanced security, podcast transcripts, Apple Cash virtual numbers, and other useful features. There are even new additions hidden within Safari. Find out what's new and changed on your iPhone with the iOS 17.4 update.


5 Comments
Nice, on my device the app never asks for the su access and by result never show the destiny and screen size setting. I'm sure I'm rooted. Can it be because I've already customised Build.prop ??
Also anyone knows if this setting also applies to the lockscreen ?
That's why i installed the app for in the first place...
Thanks
Root checker
THIS IS HOW YOU DO IT WITHOUT ROOT!
Check this youtube video out it has a link which has adb already setup and also has a link to figure out everyones stock dpi in the description, if this helped you, please give it a thumbs up!
is having a rooted device essential for this?
Does anybody know how to free up another screen? My new LG Volt2 has only TWO screens, maybe the icons are too big? Crazy.
Share Your Thoughts